Have you ever tried symmetry painting with kids? It’s one of the most fun and easy crafts for kids and is perfect for all ages. Watching the other half of your drawing magically appear is mesmerizing and addicting.
As a grown-up, I’ve had a lot of fun doing it myself. I couldn’t stop making new designs and kept thinking of symmetrical animals that could be fun. As ocean lovers, we decided to try different ocean animals, but you can apply this activity to any symmetrical animal or object!
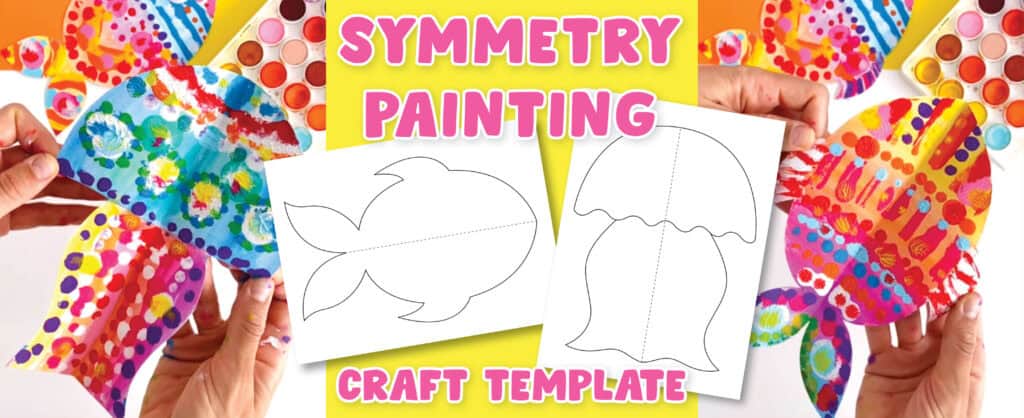
Symmetry Painting with Ocean Animals, Free Craft Template
Why should you try symmetry painting with kids?
More than just a fun activity, symmetry or mirror painting opens up a world of learning. It’s a great way to introduce the concept of symmetry to children and its applications in everyday life. You can use it to point out examples in nature, like the symmetry in leaves, fruits, flowers, fish, bugs, butterflies, and birds. We love ocean animals, so we chose fish and jellyfish. But you can also think of seastars, crabs, shells, turtles, octopuses, etc. You can apply this craft technique to every season!
For this activity, you only need a few basic craft supplies that you most likely have at home or in the classroom already. To make this symmetry craft activity even more accessible, I´ve created a free printable from the fish and the jellyfish you can use. Just print out the printable and use it as your craft base. Let’s begin symmetry painting and follow the step-by-step craft steps below.
By using this site, you agree to our privacy policy and terms of use. This article contains affiliate links. Please read our full disclosure here.
Craft supplies for fish and jellyfish
As I mentioned, you don´t need many craft supplies for symmetry painting. This makes it the perfect craft for classroom use as well. Gather the supplies below so we can get started with our symmetrical animal.
Craft supplies needed:
- Printable, get it here (optional)
- White paper
- Watercolors (optional)
- Tempera kids paint or acrylic paint
- Paintbrush
- Googly eyes (optional)
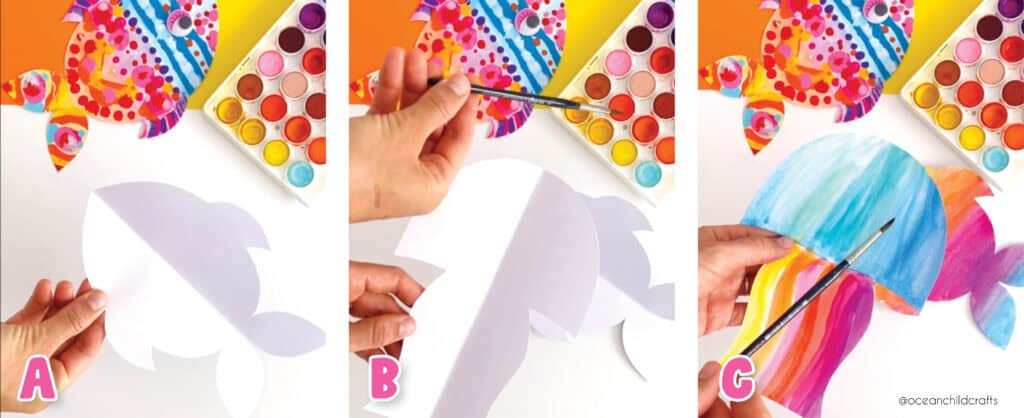
Symmetry Painting with Free Craft Printable
How to do symmetry painting with kids
Step 1: Gather the craft supplies above. You can use our free symmetry craft printable, but you don´t need to. You can also start with clean white paper.
Step 2: What animal are you going to create? Think about symmetrical animals like insects, fishes, reptiles, birds, etc. We love ocean animals, so we chose a fish and a jellyfish. But you can also think of sea stars, crabs, shells, turtles, octopuses, etc.
In this blog post, I will use the jellyfish as an example. Start with the printable or vertical white paper in letter or A4 size. If you start from scratch and don’t use the printable, I recommend folding your paper in half first (long side). This way, you have your middle line ready, and it´s easy to draw half of a jellyfish.
Step 3: You can cut out your symmetrical animal before painting like we did (see pictures A & B), but with little kids, it’s easier to cut your animal after the paint is dry. So, let’s wait with cutting till the paint is dry.
Step 4: Time to paint! Now that your jellyfish is ready, we start adding the paint. We used watercolors and tempera paint. We gave our jellyfish a base color with light watercolors (see picture C). But you can also skip this part and directly add the tempera paint; see step 5 below.
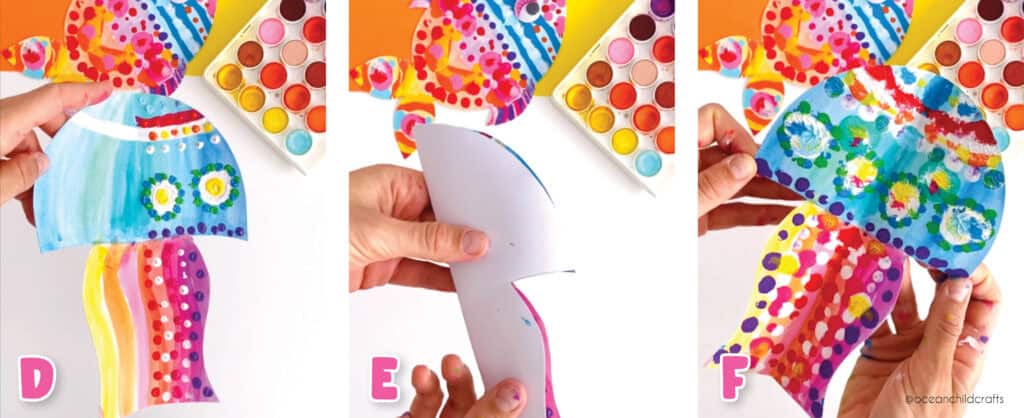
Ocean Animals Symmetry Activity
Step 5: When your watercolor base is dry, you can fold your paper in half. Using the dashed lines on the printable, ensure the watercolors are on the outside.
Now, it´s time to add the tempera or acrylic paint. We used acrylic paint from Amsterdam Acrylics, but with small kids, washable paint is recommended. We created patterns for our animals by adding little paint dots (see picture D). If you like to add little paint dots, it´s easy for kids to use cotton sticks to apply the paint. Decorate half of your jellyfish with paint dots (see picture D). Make sure the paint is slightly wet; this will help to transfer the paint to the other side when you fold it over (see step 6 below)
Step 6: Now, fold your design with paint in the middle. Fold over and press down to transfer the paint to the other side (see picture E). Press and rub your hand over the paper to ensure the paint transfers to the other side.
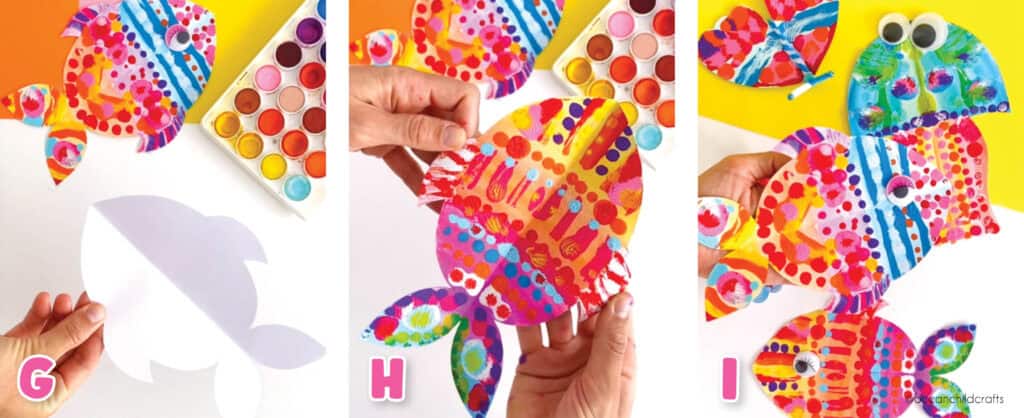
Symmetry Fish Painting for Kids
Step 7: This is the exciting part! Now, gently open your paper to reveal your gorgeous and symmetrical animal. Let the paint dry!
Step 8: When the paint is dry, cut out your animal. You can give your animal two googly eyes or draw a cute face with a black marker.
Great job! Now that you have mastered the technique, experiment with different colors, patterns, and animals. We created so many that we lost count.
More Fun Ocean and Paper Fish Crafts To Try With Kids!
Finished your DIY origami fish? Great job! Now try some of our other easy ocean crafts for kids:
These make perfect additions to an ocean-themed week, homeschool lessons, or kids’ summer craft camps!
Ocean-Themed Craft Printables, Ready to Use and Fun to Make!
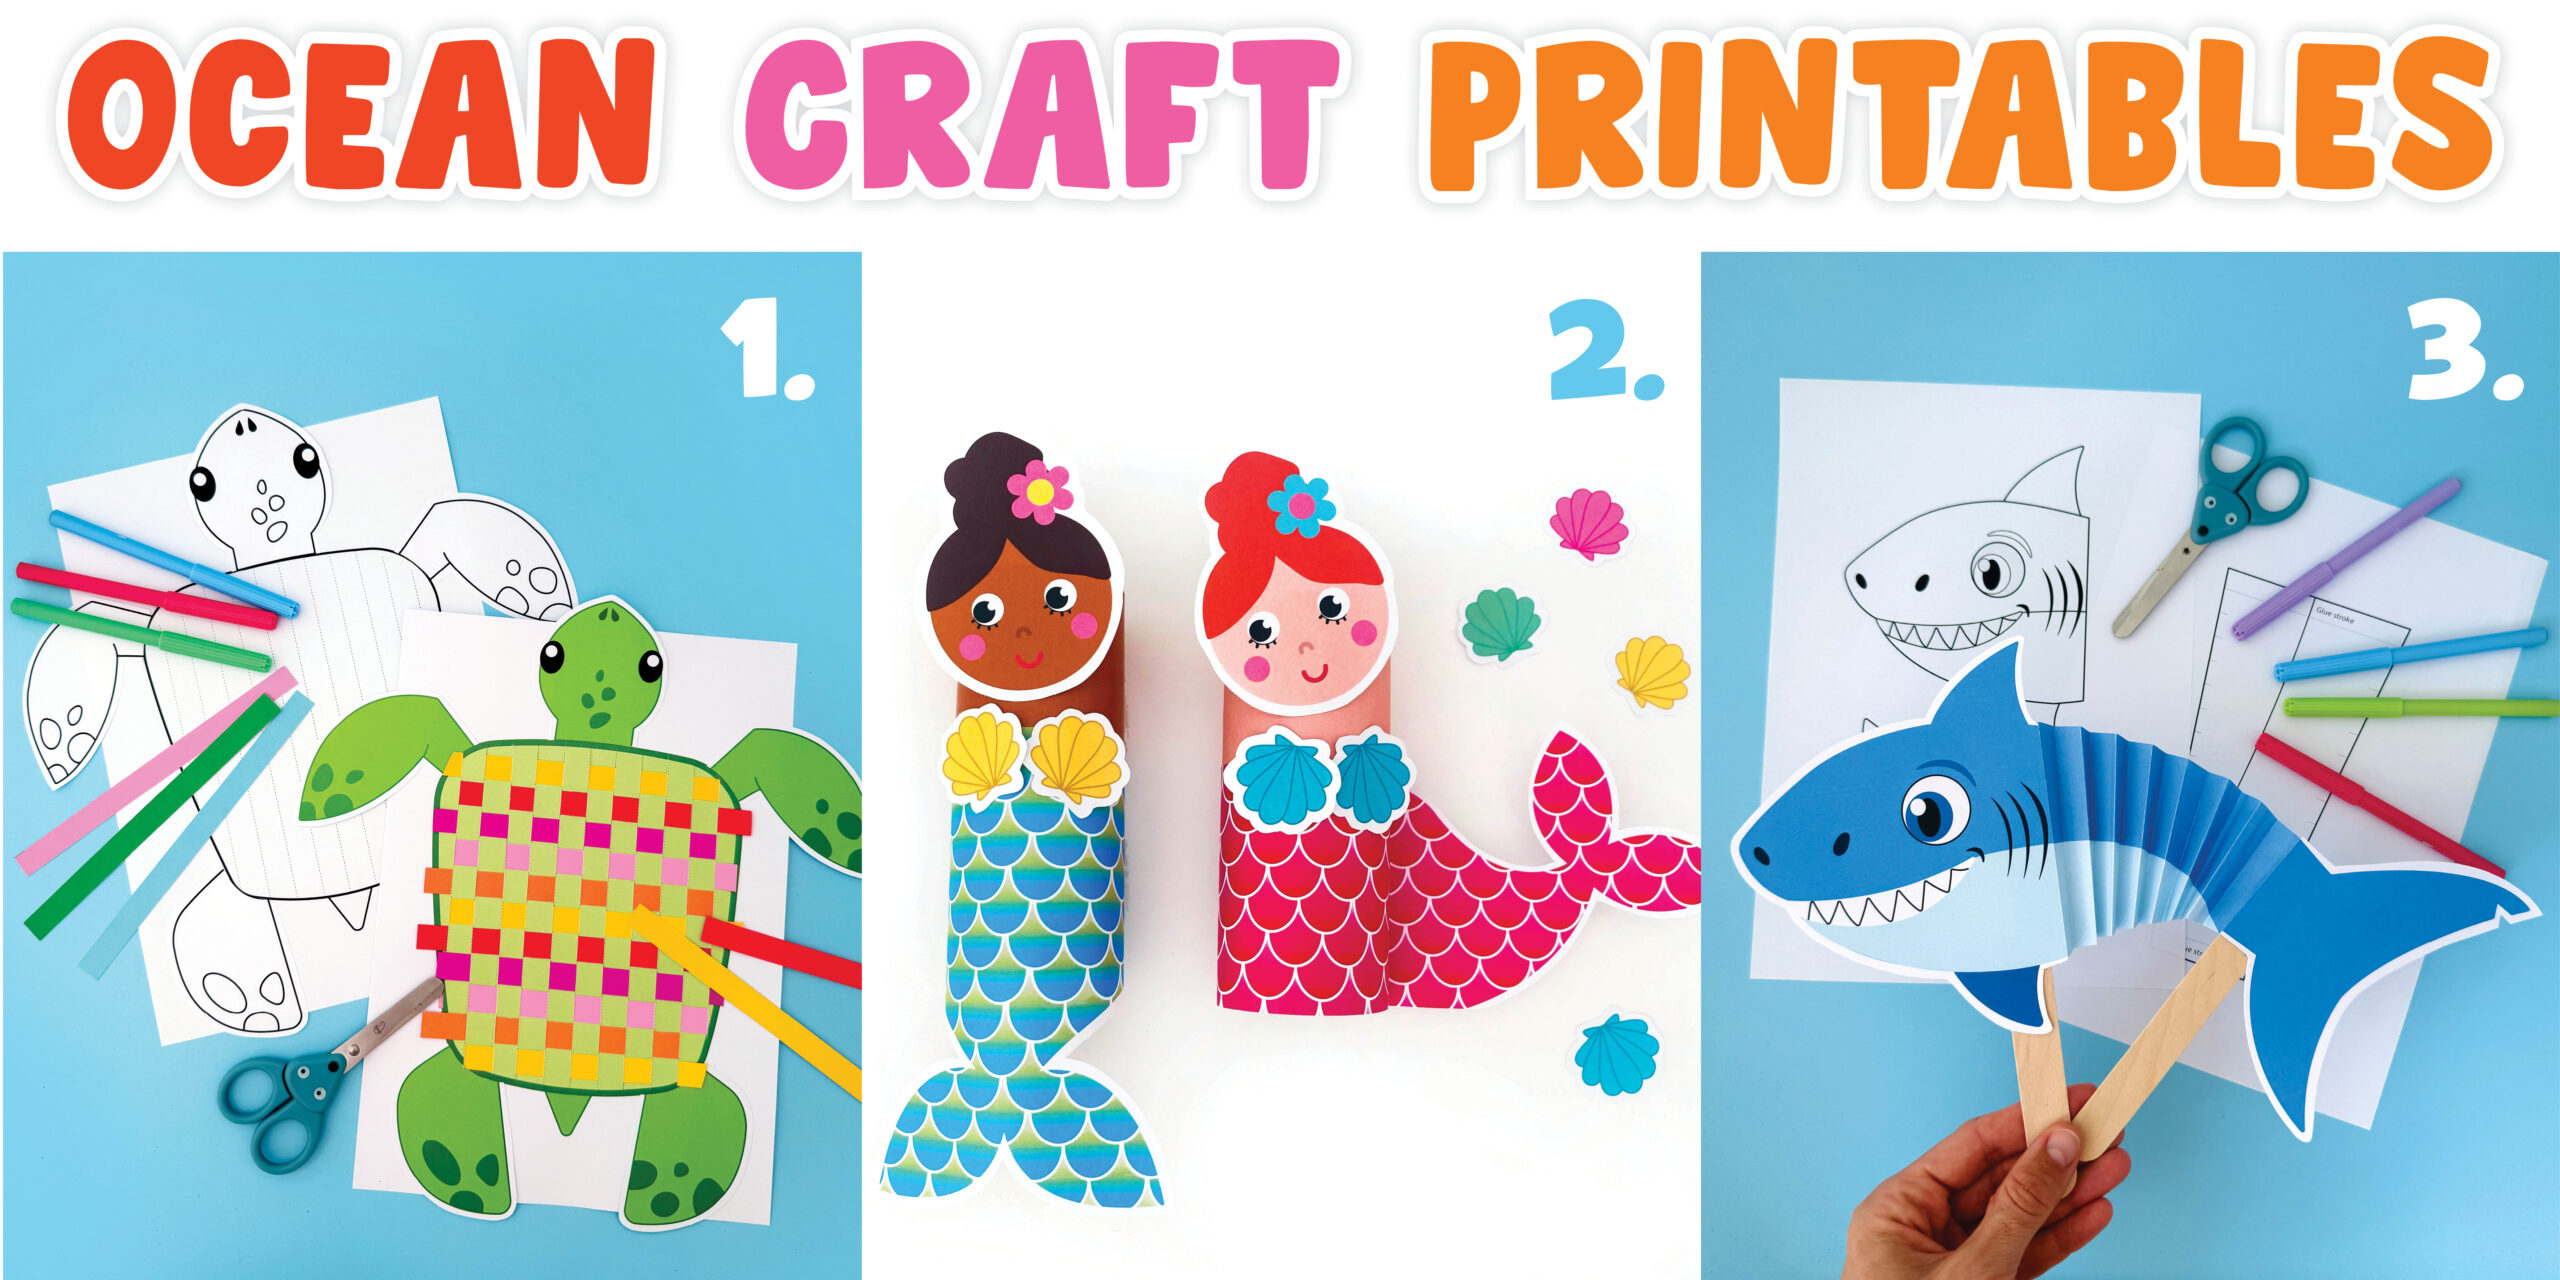
Short on prep time? We’ve got you covered! Our printable ocean craft packs are designed to make creative time simple, fun, and stress-free. Each pack comes in both full color and black-and-white coloring page versions, so kids can customize their creations and add their own flair.
Here are a few of our most-loved ocean printables, see pictures above. You can purchase them on our website, Etsy Store and Teachers Pay Teachers:
- Sea Turtle Shell Weaving – A perfect blend of fine motor skills and creative play.
-
BIG Mermaid Puppet Bundle – A magical favorite packed with movement and sparkle!
-
Swimming Shark Puppet – Always a hit with shark fans and full of ocean action.
Whether you’re a parent, teacher, or homeschooler, these print-and-go craft kits are perfect for engaging little learners in a creative underwater adventure!
 How to Make a 3D Paper Christmas Tree Ornament (Free Printable for Kids)
 Teach Kids to Stitch with This Cute Pineapple Cross-Stitch Craft (Free Pattern)
 Easy & Fun Origami Paper Fish Craft for Kids With YouTube Tutorial


Leave a Reply