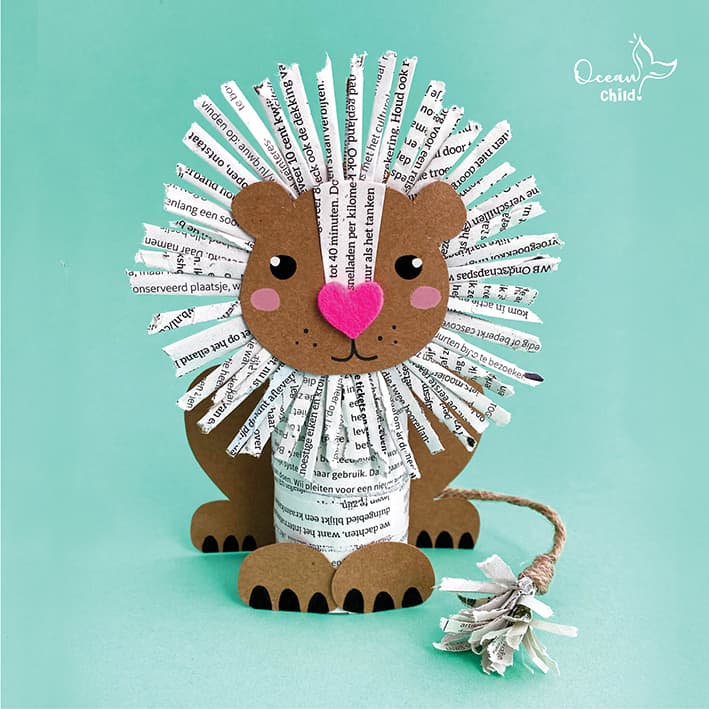
Paper roll lion with only recycled materials
How fantastic is this lion newspaper craft from only recycled materials? The perfect craft for when you don’t have a lot of art and craft supplies on hand. Even without fancy craft supplies, you can still be creative and craft something fun from recycled materials. This paper roll lion craft is budget-friendly and kind to the earth. So gather your craft supplies, and let’s get started!
By using this site, you agree to our terms of use. This article contains affiliate links; read our full discloser here.
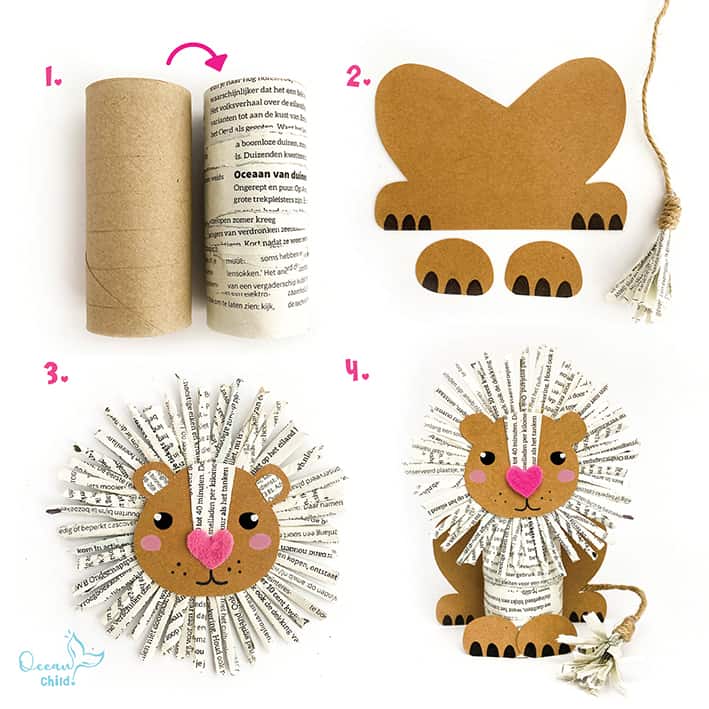
Step-by-step paper roll lion craft with newspaper manes
Craft Supplies Lion newspaper craft
- TP-roll
- Old magazine or newspaper
- Brown cardstock or cardboard
- Scissor
- School glue and glue stick
- Black marker, we used our Posca markers
- Pink felt fabric(optional)
- Pink paint marker (optional)
Step 1: Tear a newspaper or magazine in pieces/strokes. Try to use white pages with black text rather than images.
Step 2: Take an empty TP roll and glue the strokes of newspaper around the roll till the entire roll is covered (see picture 1).
Step 3: Make the lion’s back and two front legs with cardboard or cardstock. Please look at picture 2 on how to draw/cut these parts.
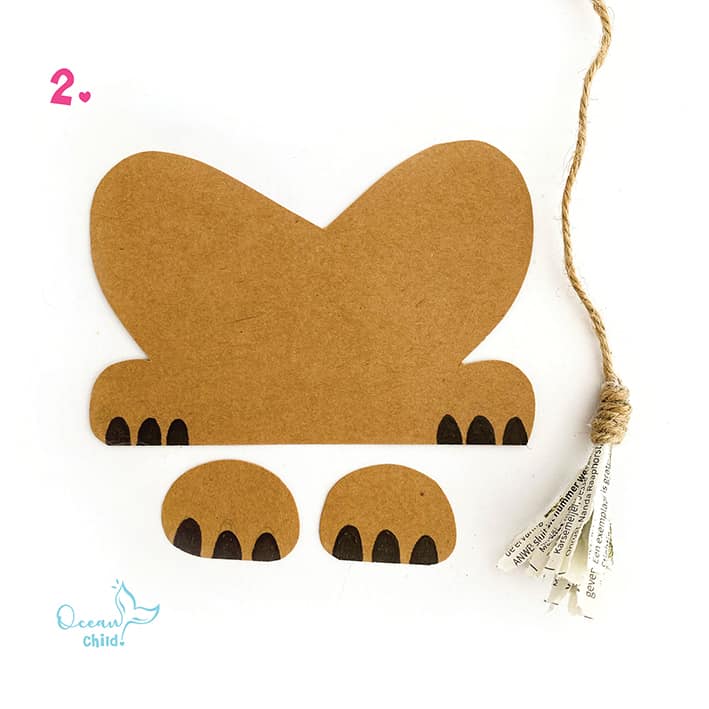
Lion newspaper craft with only recycled materials
Step 4: Create a tail from yarn and newspaper. Cut a small square out of an old newspaper, roll up the square, and tape off the end. Make little cuts on the other side to create a brush or pom-pom effect. Now you can wrap yarn around the tape so the video is covered, and leave out a string of yarn to attach the tail to the lion, see picture 2.
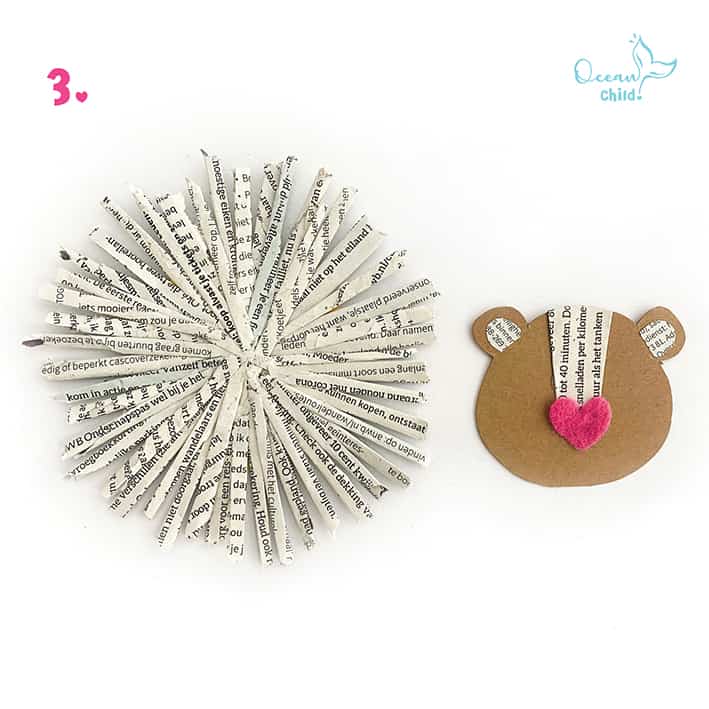
recycled newspaper craft of a lion
Step 5: Now, we’re going to create the lion manes. Cut a circle from cardboard or cardstock, and on top of the ring, you will glue strokes of the newspaper. We rolled up each stroke of paper so they became stronger. We created a whole process of strokes, like a sun (see picture 3).
Step 6: Take another piece of cardboard or cardstock and cut out a lion head with two ears (see picture 3). In the middle, you glue a stroke newspaper with a heart-shaped nose. We use felt for the nose, but you can also use (news)paper.
Step 7: Draw two eyes and a mouth with a black sharpie. The pink cheeks are optional.
Step 8: Glue your lion together; see the picture below!
I hope you had fun crafting this lion from recycled materials. We also created a lion with pinecone manes; the instructions are here!
Check out the blog post favorites for more information about our favorite craft supplies and stores. And don’t forget to subscribe to our YouTube channel for step-by-step craft instructions!
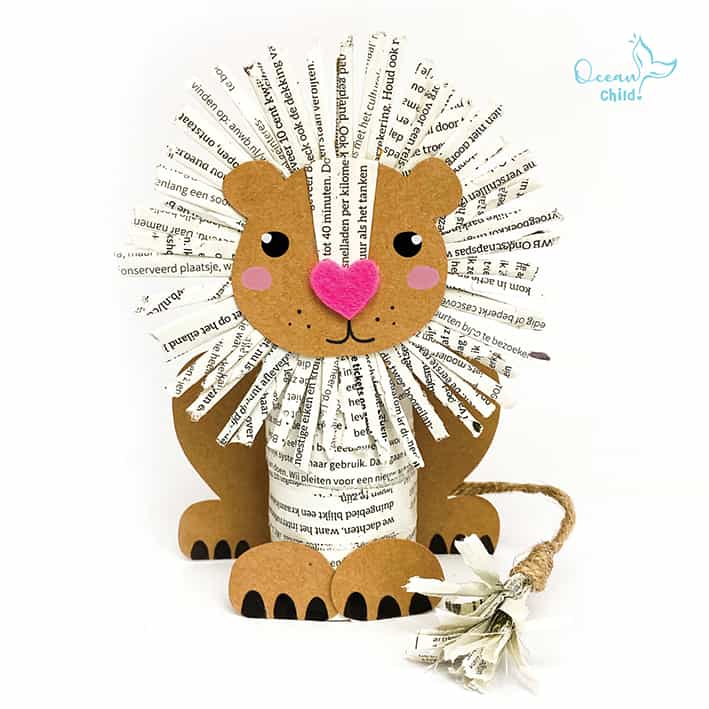
Recycle craft, newspaper lion
 Easy Lilo and Stitch Craft for Kids: Step-by-Step Fun at Home!
 Colorful Paper Roll Bird Puppet Craft for Kids
 Symmetry Painting Ocean Animals With Free Craft Template
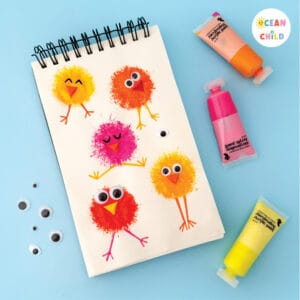 Hop into Spring: Fun and Easy Straw Print Chick Painting for Easter


You’ve been a great help to me. Thank you!
Can you write more about it? Your articles are always helpful to me. Thank you!
You’ve been terrific to me. Thank you!