Shiny aluminum foil Christmas ornaments are a fun and easy craft for kids to make during the holiday season. Get ready to add sparkle to your holiday crafting with this aluminum foil Christmas ornament craft for kids. This art project is simple, colorful, and full of festive fun. If you’ve never tried coloring on foil before, you’re in for a treat, it’s a magical process that turns ordinary materials into stunning holiday decorations.
Whether you’re a parent looking for a creative Christmas activity at home or a teacher planning a festive classroom craft, these foil ornaments are the perfect blend of art and Christmas cheer.
Kids love how shiny and vibrant their creations turn out. Plus, this tin foil craft works beautifully for all ages—toddlers, preschoolers, and elementary students alike. You can make Christmas trees, ornaments, stars, bells, or even try other shapes like butterflies, rainbows, or hearts for year-round fun.
By using this site, you agree to our privacy policy and terms of use. This article contains affiliate links. Please read our full disclosure here.
-
- Coloring On Tin Foil Magical Craft
-
- Foil Ornaments!
-
- Coloring Christmas Activity
Why You’ll Love This Aluminum Foil Craft
- Bright and shiny results that kids love
- Perfect for the holidays as ornaments, cards, or gift tags
- Simple supplies that you likely already have at home
- Great for fine motor skills, color exploration, and creativity
- Works for classroom art, family crafting, or rainy-day fun
Create Beautiful Aluminum Foil Ornaments with Kids!
Materials Needed for Aluminum Foil Christmas Ornaments
You’ll only need a few simple supplies for this easy Christmas craft:
- Aluminum foil
- Colored markers (broad tips work best)
- Cardboard (sturdy and smooth)
- Twine or yarn (for hanging)
- Tape
- Scissors
- Glue
- Ribbon (optional, for decoration)
By using this site, you agree to our privacy policy and terms of use. This article contains affiliate links. Please read our full disclosure here.
Foil Ornaments for Christmas
How to Make Aluminum Foil Christmas Ornaments with Kids
Step 1: Choose Your Shape
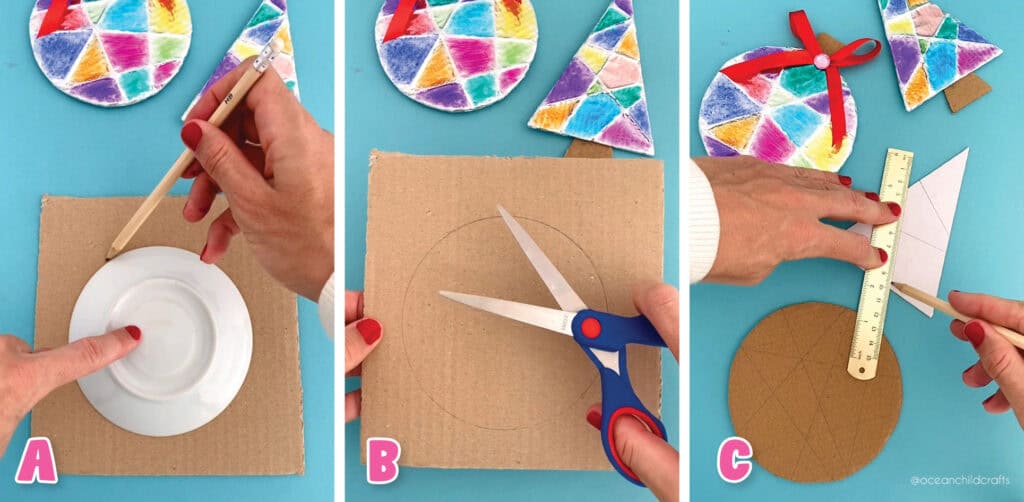
Start by deciding what to create. For Christmas, try simple shapes like trees, ornaments, or candy canes. Trace or draw your shapes onto cardboard. For younger kids, bigger shapes are easier to handle.
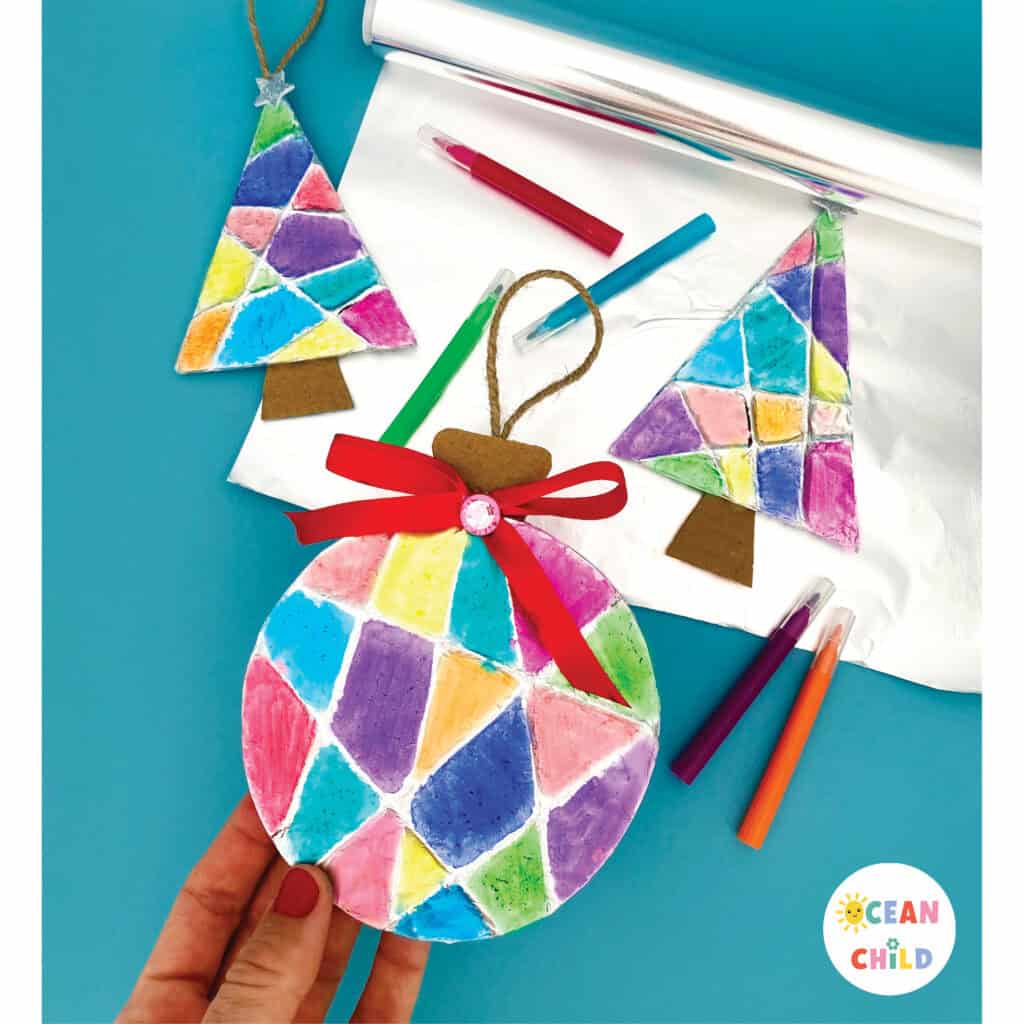
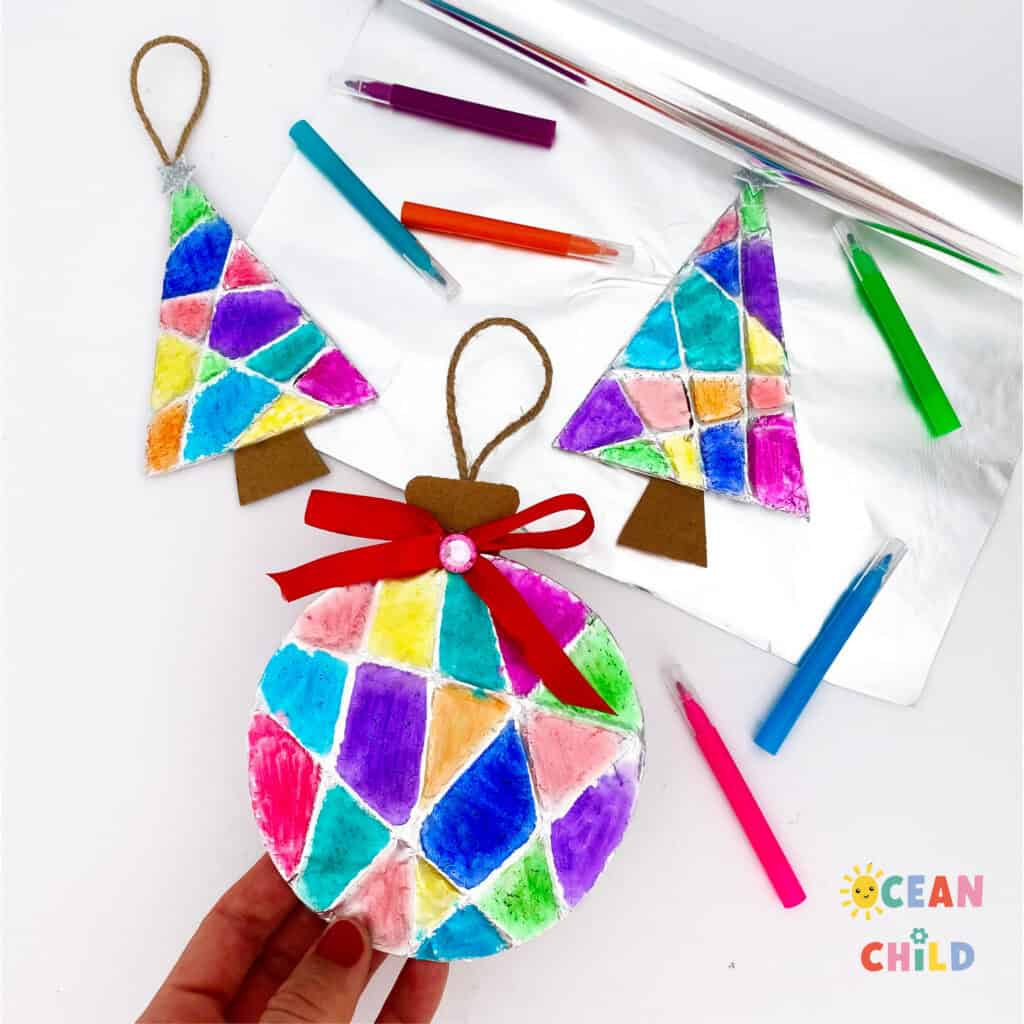
We made round ornaments (about 4.5 inches / 11 cm in diameter) and triangle Christmas trees (about 5.5 inches / 13 cm tall). Cut out your shapes and make sure your cardboard is smooth and firm, no air pockets or creases. See images A and B for reference.
Step 2: Add Your Design Lines
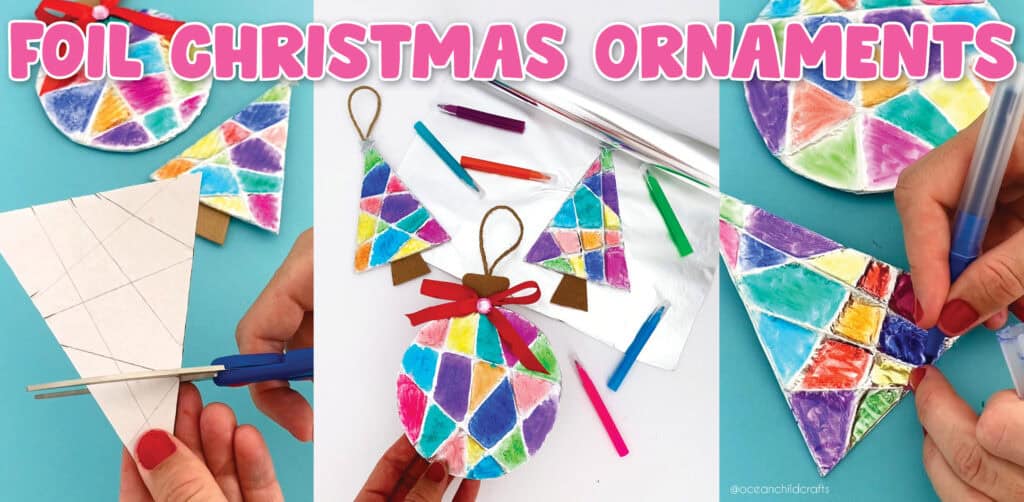
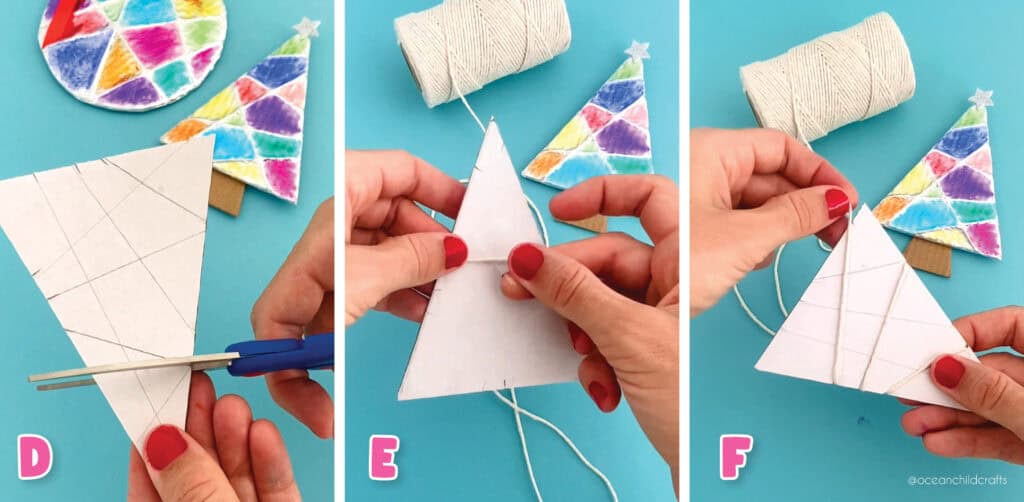
Use a pencil and ruler to draw abstract lines or patterns across your shapes. These will guide where your twine will go later. Keep your sections large enough for kids to color in easily. See images C and D for reference.
Foil Coloring Christmas Craft Kids
Step 3: Attach the Twine
Make tiny cuts (about 0.3–0.5 cm deep) around the edges of your shape, see image D above. Thread twine through these notches, following the lines you drew earlier. Tape the ends of the twine to the back of your shape to secure them. See images E and F for reference.
This step gives your ornaments a raised “stained glass” texture that looks beautiful once covered in foil.
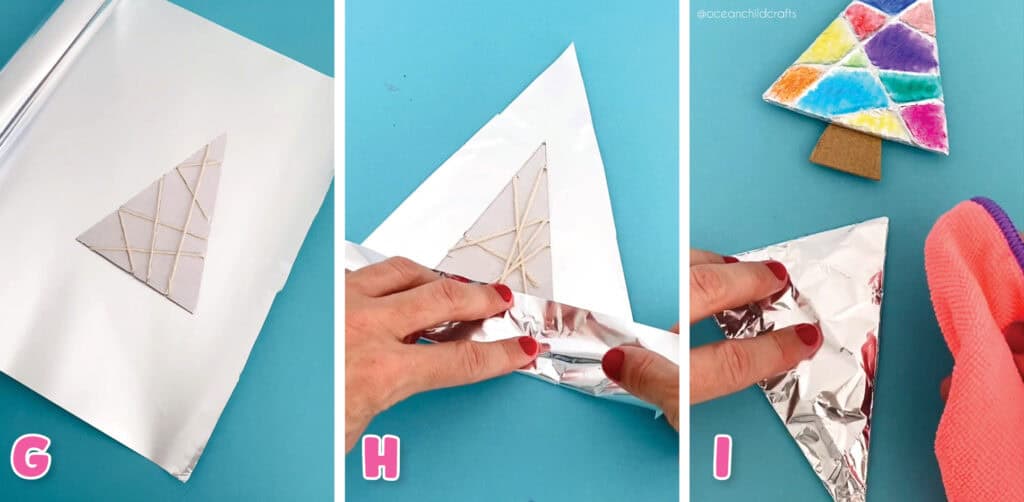
Step 4: Wrap in Aluminum Foil
Now for the fun part, shiny foil time. Gently wrap your shape in aluminum foil, folding the edges neatly around the back. The good side of the cardboard should face the front so your design shows clearly. See images G and H for reference.
Use a soft cloth to gently rub the surface and make the twine texture stand out (see image I below). Both the shiny and matte sides of foil work great, choose your favorite.
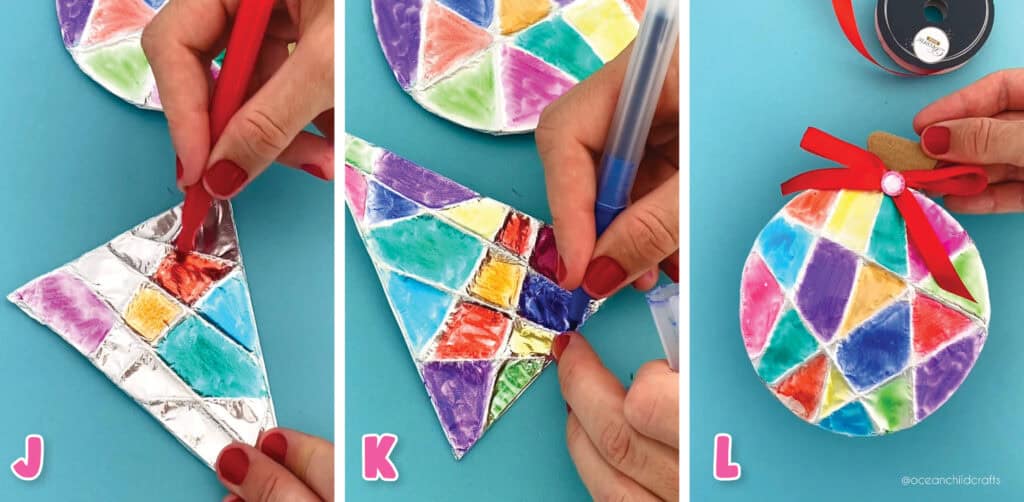
Step 5: Color Your Foil
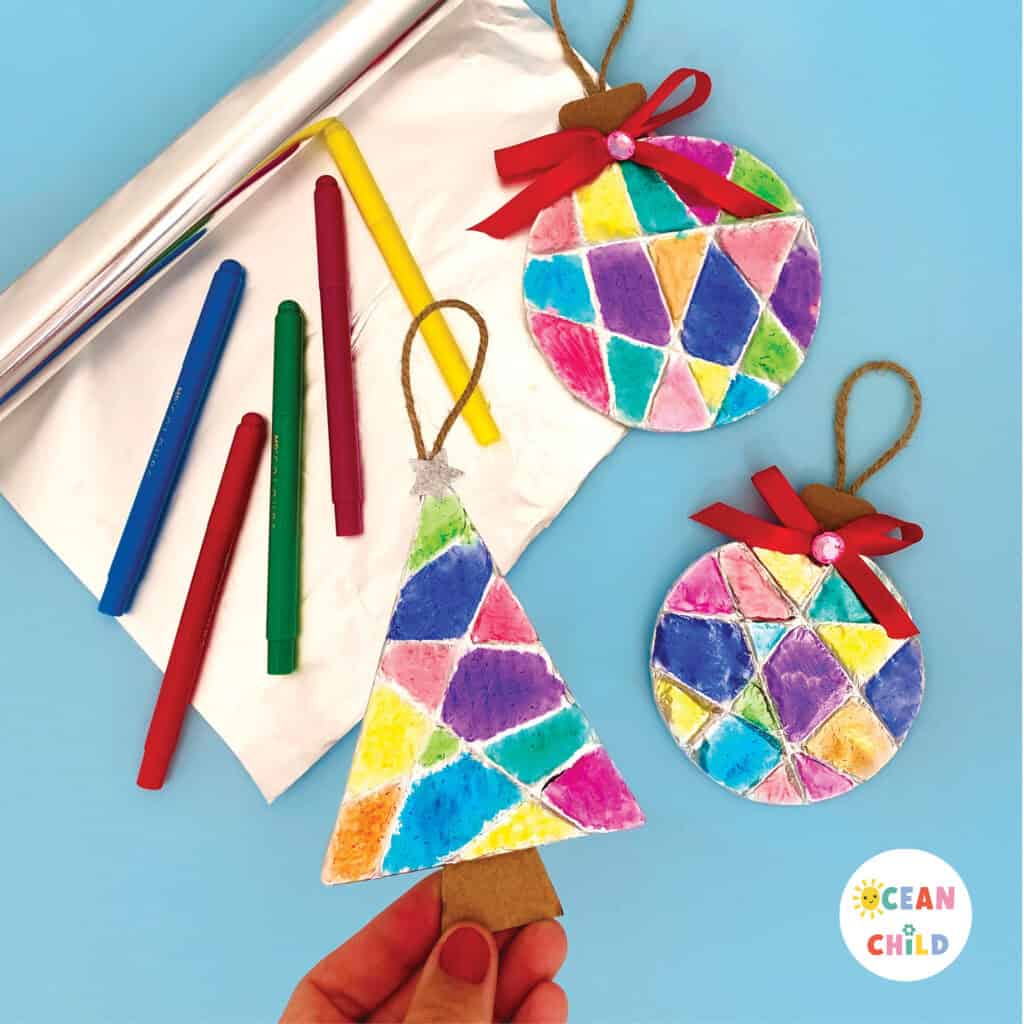
Use broad-tip markers to color between the raised lines. Darker shades like blue, red, green, purple, and pink pop beautifully against the foil background.
Avoid pastel shades, as they don’t show up well on foil. Encourage kids to use contrasting colors for extra shine.
Foil Coloring Christmas Tree Craft
Step 6: Add Details and Decorations
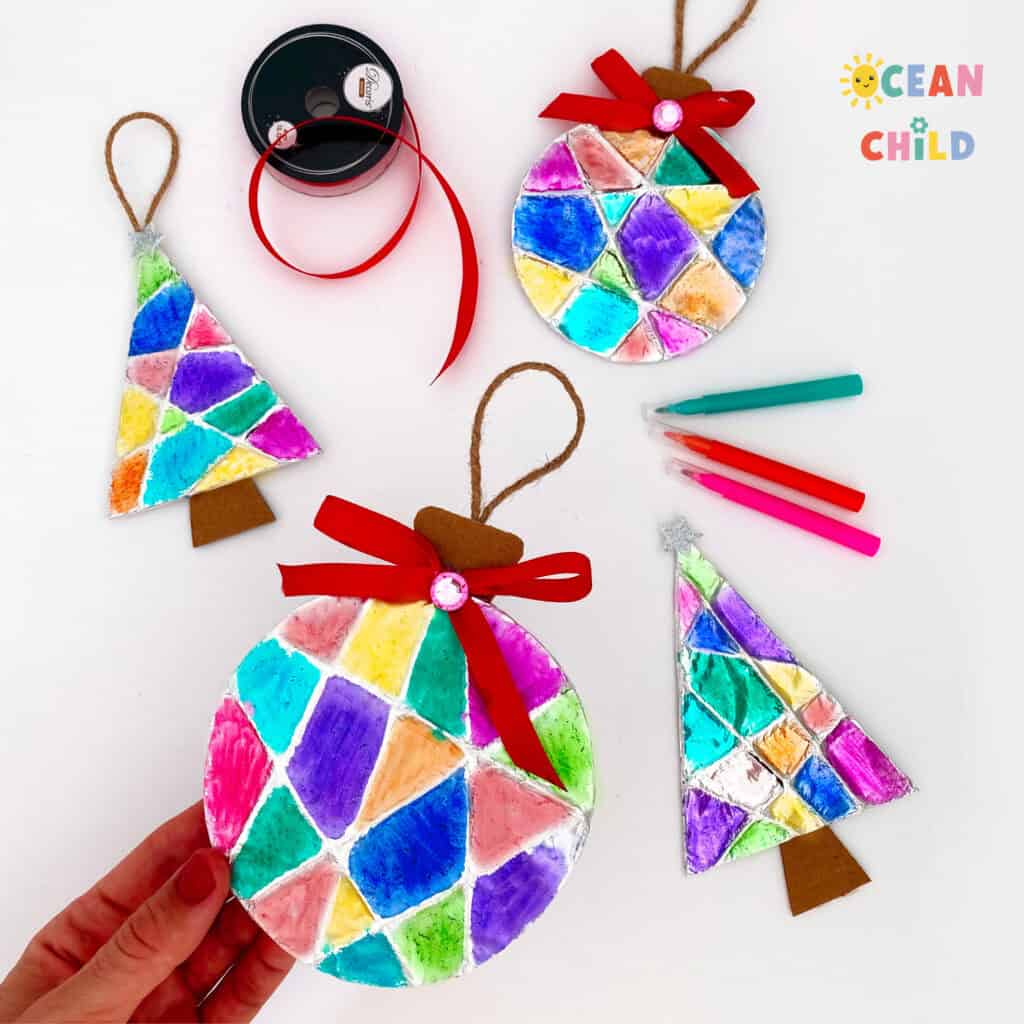
Once the coloring is done, personalize your ornament. Add a small cardboard trunk to your Christmas tree, or a paper cap and bow to your round ornament. A touch of ribbon, sequins, or glitter glue adds even more sparkle. See the images below for fun color inspiration.
Step 7: Hang Your Ornaments
Turn your foil shapes into hanging decorations by attaching a loop of twine or yarn to the back. We used a festive red ribbon. Now they’re ready to shine on your Christmas tree.
You can also glue them to greeting cards or gift tags for an extra personal touch.
Aluminium Foil Craft for Christmas
Teacher and Parent Tips
- This craft is low-prep and works well for large groups.
- Ideal for holiday classrooms, art centers, or family craft days.
- For toddlers or preschoolers, pre-cut the shapes in advance.
- Encourage creativity, no two foil ornaments look the same.
-
- Foil Ornaments Craft for Kids
-

- Aluminium Foil Christmas Craft
Educational Benefits
This project isn’t just pretty, it’s educational too. Kids strengthen their fine motor skills, explore color theory, and experiment with texture and reflection. It’s also a mindful, calming activity that encourages focus and creativity.
More Fun Christmas Crafts
Looking for even more festive craft ideas? Discover our 29 fun and easy Christmas crafts for kids, packed with creative projects for all ages.
Or try one of these favorites, our beautiful paper angel ornaments or upcycled Volkswagen vans with a fun Christmas twist! See images bellow for inspiration.
-
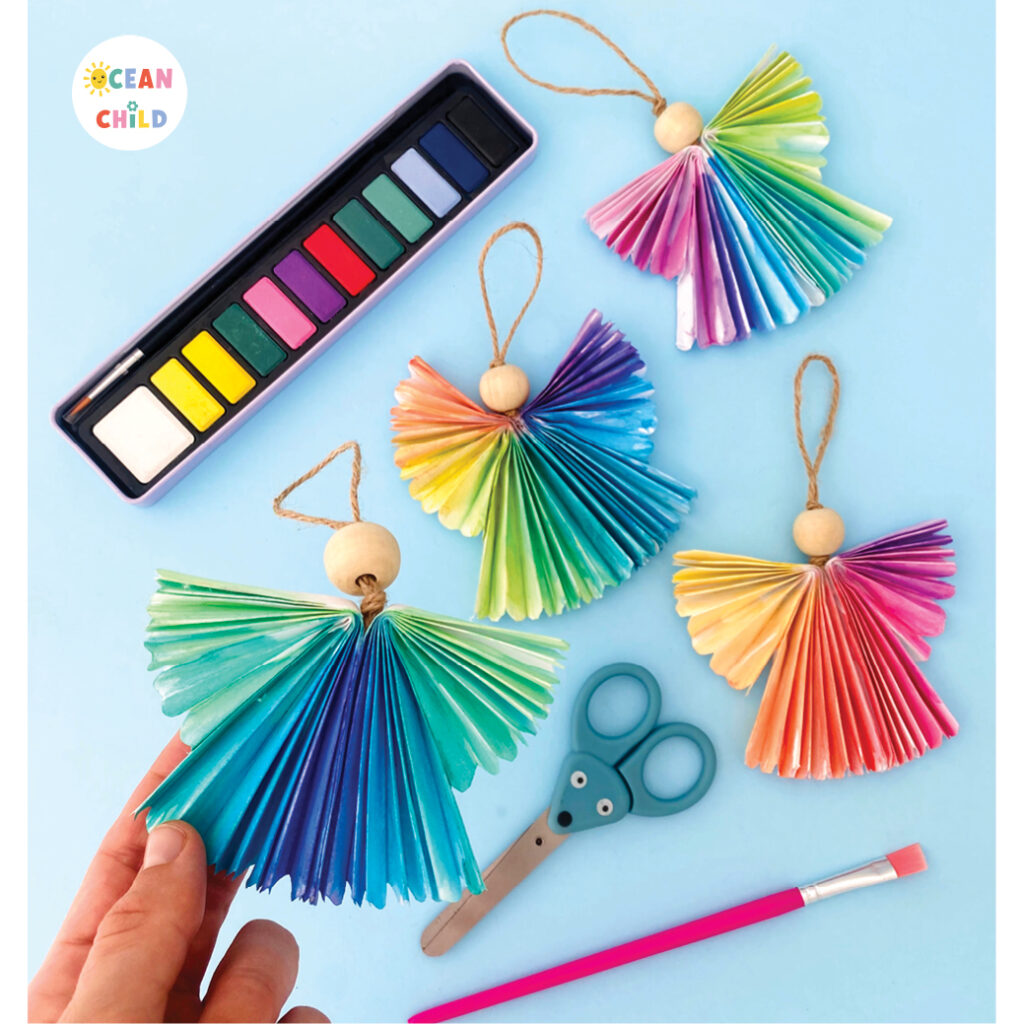
- Easy Paper Angel Ornament
-

- DIY Volkswagen Van Christmas
Final Thoughts
This aluminum foil ornament craft is the perfect mix of art and Christmas spirit. It’s shiny, colorful, and easy enough for kids of all ages to enjoy. Whether you’re making Christmas decorations, classroom art projects, or heartfelt homemade gifts, these foil creations are sure to brighten your holiday season.
So grab your foil, markers, and cardboard and let the holiday crafting sparkle begin.
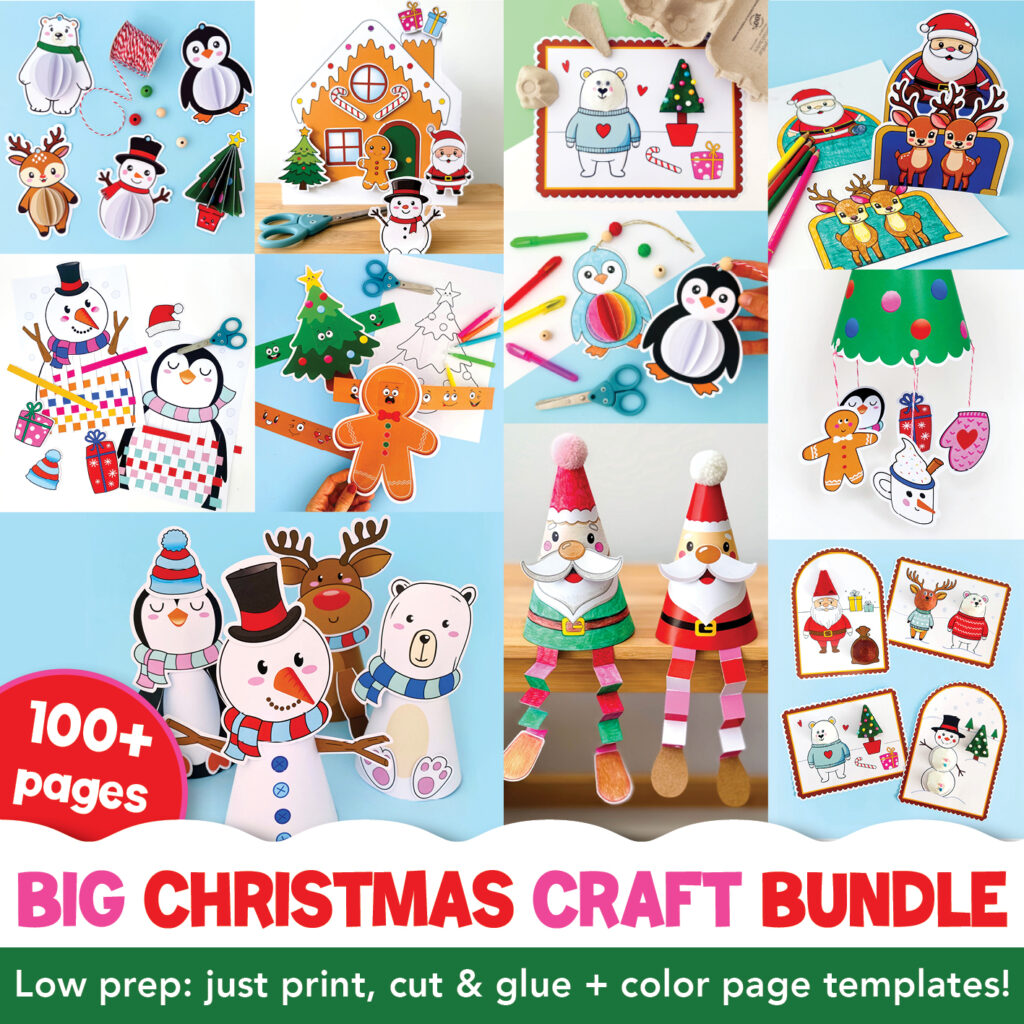
Get Our BIG Christmas Craft Printable Bundle
Keep kids creating all season long with our BIG Christmas Craft Printable Bundle! Packed with festive templates, coloring pages, and easy crafts for ages 5–8 (see graphic below for a sneak peek). Low-prep and ready to print, perfect for home or classroom fun. Get it now on Teachers Pay Teachers or in our Etsy craft printables shop. Curious what’s inside the Big Christmas Craft Bundle? I’ve put together a full preview of all 100+ printables, take a look here!
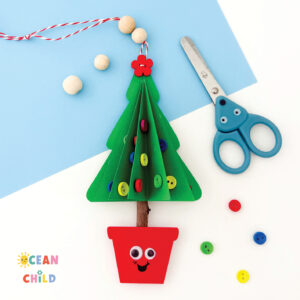 How to Make a 3D Paper Christmas Tree Ornament (Free Printable for Kids)
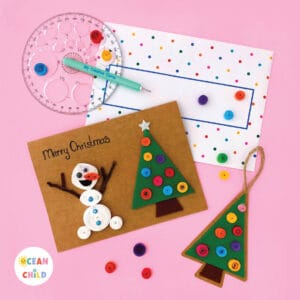 Easy Paper-Quilling Christmas Tree Ornaments For Kids!
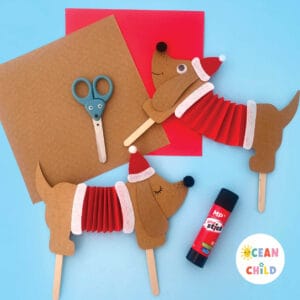 Easy Dancing Christmas Dog Paper Craft for Kids
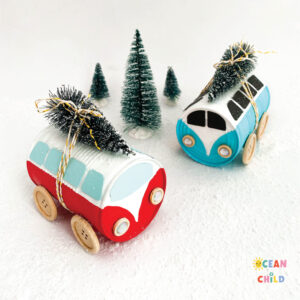 DIY Volkswagen van from recycled tin can, free craft printable!


[…] Find the step by step craft instructions on these foil ornaments right here. […]