How about crafting a beautiful pine cone butterfly! Fall is the perfect time to explore nature and get creative with seasonal craft projects! One of our favorite things to do when the leaves start to fall is to collect pine cones and turn them into something magical. Today, we’re excited to show you how to make pine cone butterfly puppets, a colorful and easy fall craft for kids that combines natural materials with creative painting.
Whether you’re a parent, teacher, or just love nature-inspired crafts, this project is fun, mess-friendly, and perfect for little hands.
By using this site, you agree to our terms of use. This article contains affiliate links; read our full discloser here.

Materials Needed for Pine Cone Butterfly Puppets
Before you begin this DIY nature craft, gather the following supplies:
-
-
Wooden craft sticks
-
White heavy paper (cardstock or watercolor paper works best)
-
Scissors
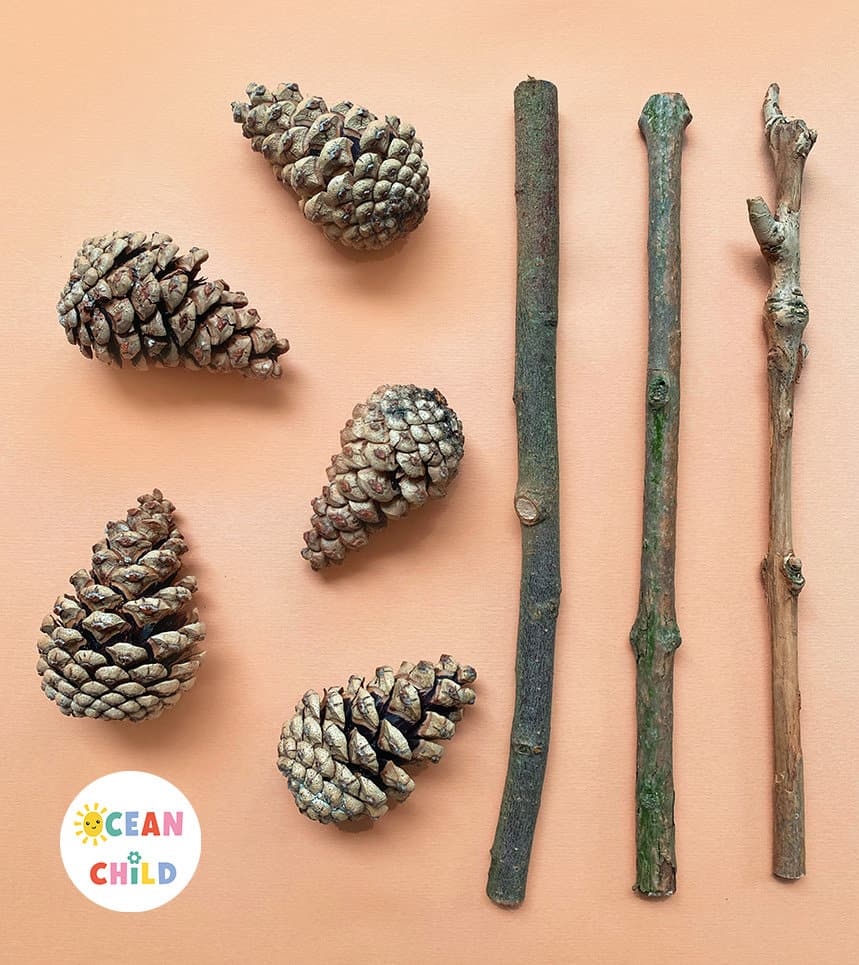
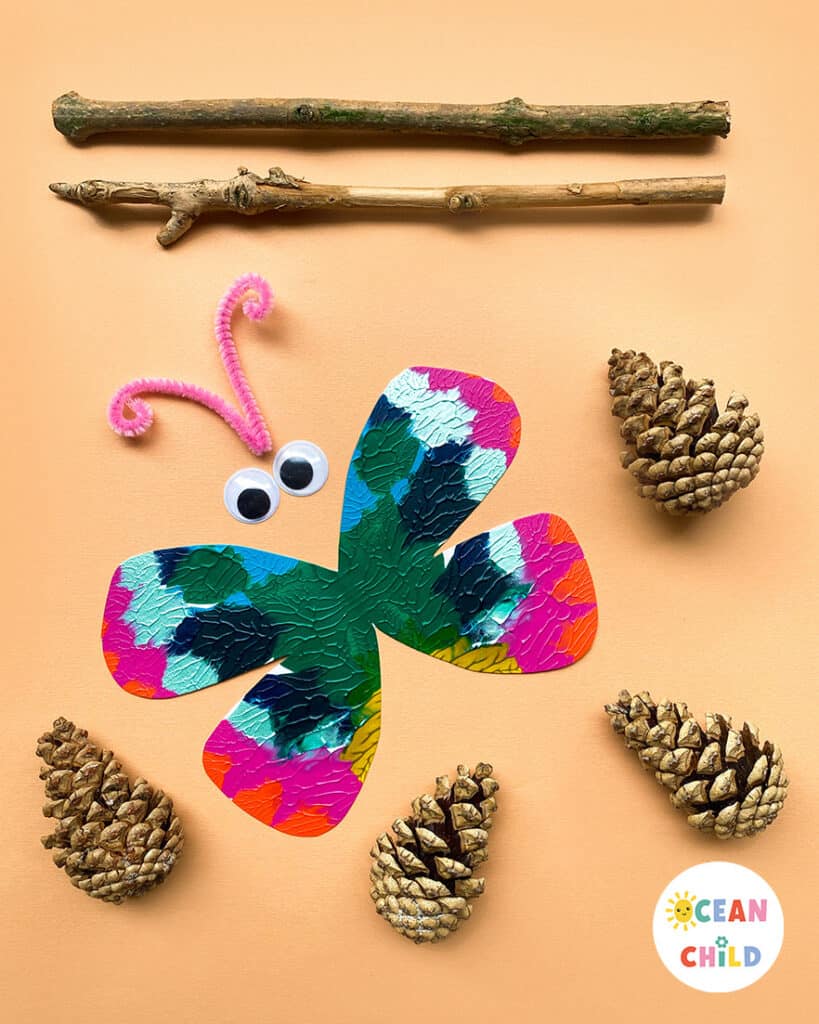
Nature craft supplies, pinecones, and sticks
Craft instructions on these nature butterfly puppets
Follow these simple steps to create your own butterfly stick puppets using pine cones and paint.
Step 1: Create the Butterfly Wings
Fold a sheet of thick white paper in half. Open it back up and add drops of bright acrylic paint on one half of the paper, preferably near the center edge. You can use a brush or squeeze the paint directly from the tube. See the picture below for reference.
Step 2: Mirror the Paint
Fold the paper again over the paint and press gently with your hands, spreading the paint between the layers. This creates a beautiful mirrored effect perfect for butterfly wings. Carefully open the paper to reveal your colorful design.
Optional: Sprinkle glitter onto the wet paint for a sparkling effect. Allow it to dry completely. See picture below!
-

- Mirror painting butterfly wings
-
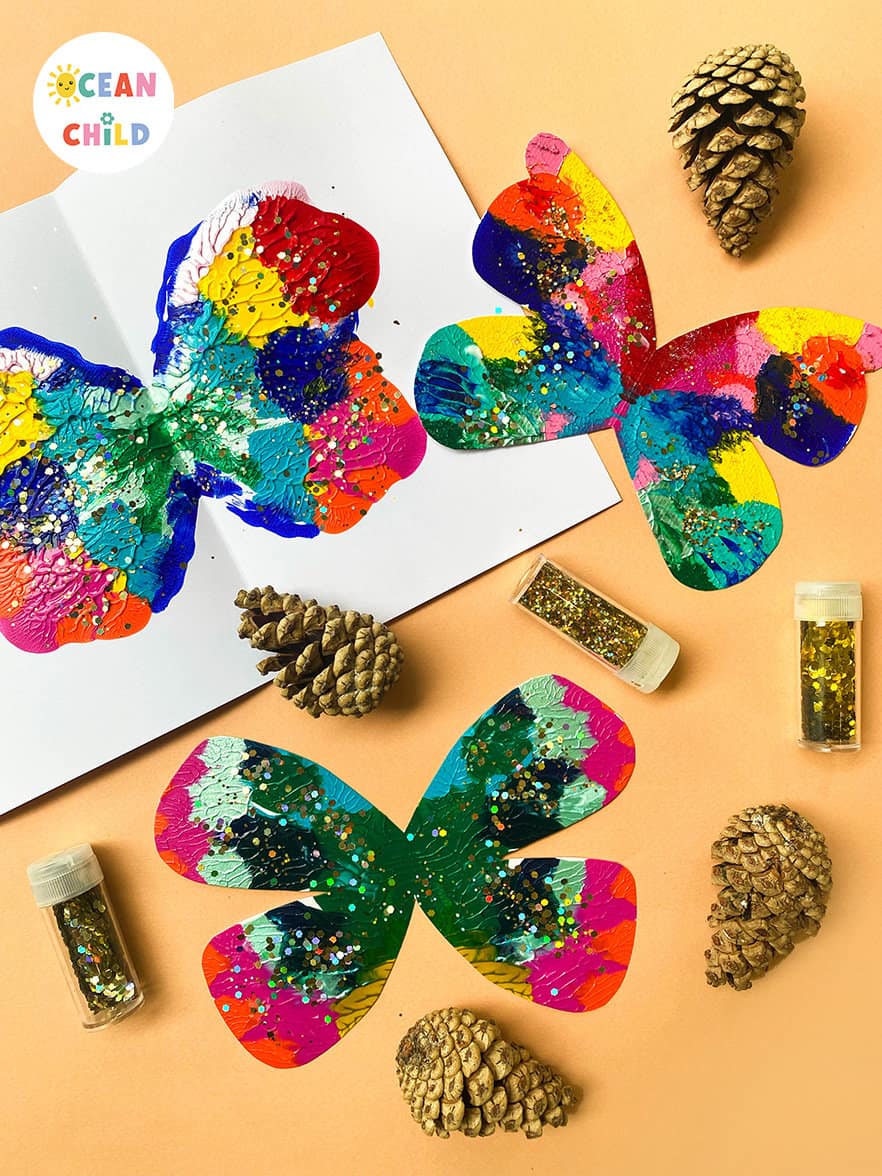
- Fall craft for kids, pinecone craft
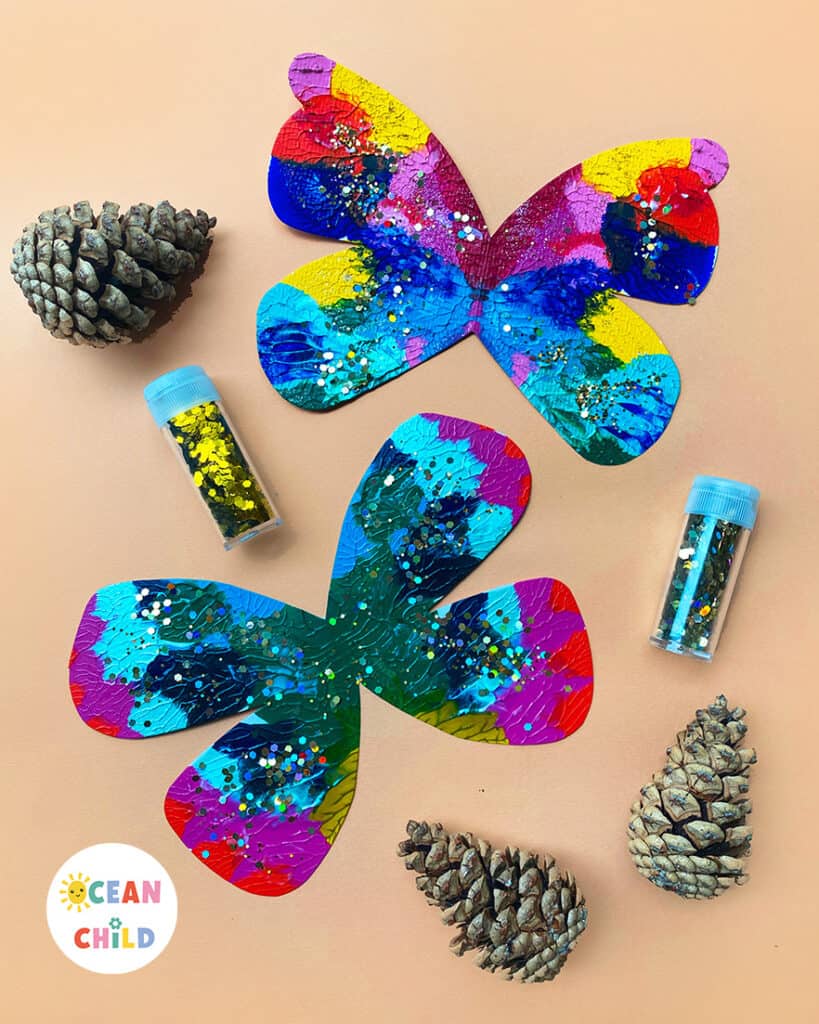
Step 3: Cut Out the Wings
Once the paint is dry, refold the paper and cut out a symmetrical butterfly wing shape. Use our photos for inspiration or create your own unique wing style. See pictures below for inspiration.
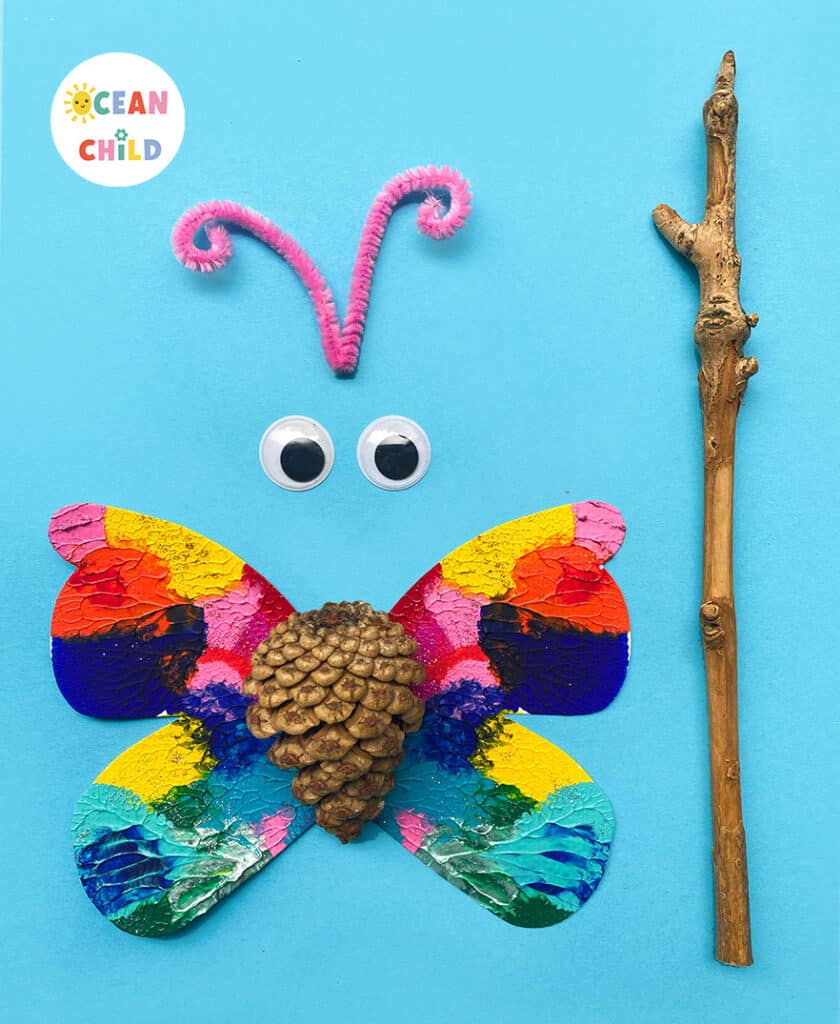
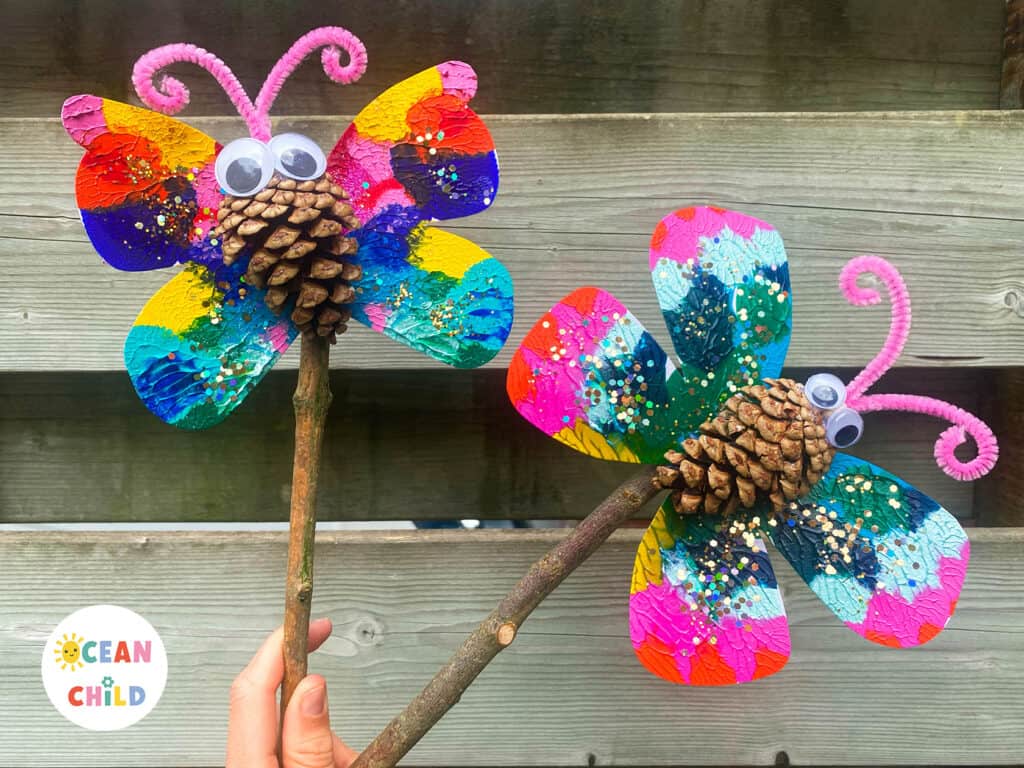
Step 4: Attach the Pine Cone
Using hot glue, attach the pine cone vertically in the center of the wings. This will be the butterfly’s body. Be sure to supervise children during this step.
Step 5: Add Antennas and Eyes
Cut small pieces of pipe cleaner, twine, or even tiny sticks for the butterfly’s antennas. Glue them to the top of the pine cone. We recommend using hot glue so the different materials stick well. Finish the face with googly eyes for a fun, playful look.
-
- Pinecone fall craft for kids
-
- Butterfly craft layout
-
- Nature fall craft activity kids
Step 6: Make It a Puppet
Finally, glue a wooden craft stick to the back of the butterfly to turn it into a puppet. You can place it straight or at an angle depending on the look you want. Let everything dry and you’re done, great job!
Final Thoughts
This pine cone butterfly craft is a great way to encourage creativity, explore seasonal nature items, and enjoy some quality crafting time with your kids. Whether you’re planning a fall activity day, a classroom project, or just want a fun afternoon craft, this one is sure to delight.
Don’t forget to save this tutorial and tag us if you try it, we’d love to see your beautiful butterflies! Happy crafting!
Fall nature craft with pinecones and sticks from outside
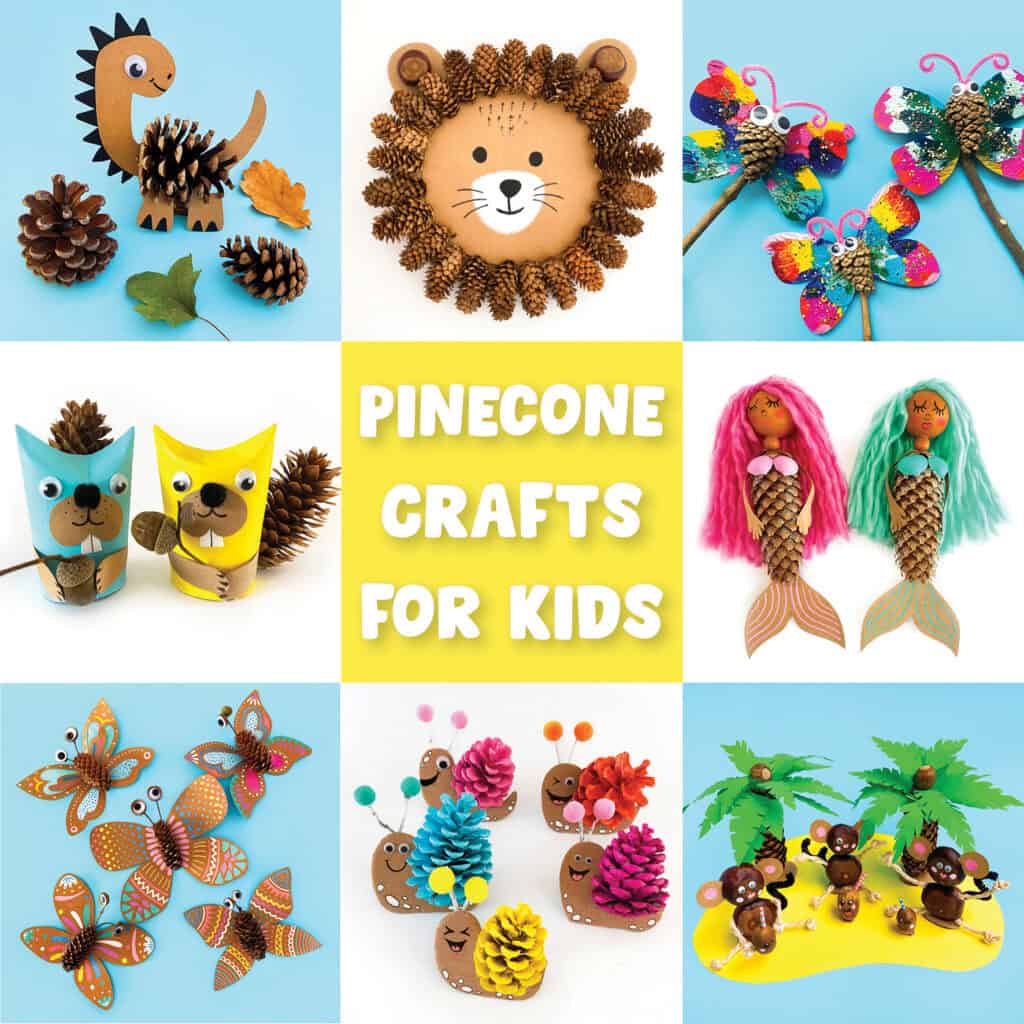
More Creative Pine Cone Crafts for Kids
If your kids enjoyed making these butterfly puppets, check out some of our other fun pine cone craft ideas:
-
Pine Cone Dinosaurs – Bright and bold prehistoric fun
-
Pine Cone Squirrels – Adorable woodland creatures
-
Pine Cone Lion Wall Hanger – A wild decoration for kids’ rooms
Pinecones aren’t just for decoration; they’re the star of some amazing kids’ crafts! Explore our top pinecone craft ideas for classrooms and home. Get inspired right here!
 8 Fun and Easy Pinecone Crafts for Kids This Fall
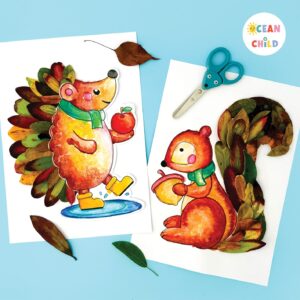 Woodland Animal Craft for Kids, Hedgehog & Squirrel with Fall Leaves
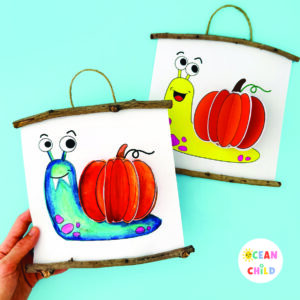 A 3D Pumpkin Snail Craft for Kids, Fall & Halloween Activity with Template
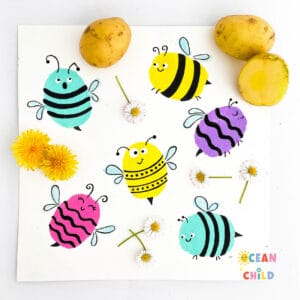 Potato stamp bees, easy bee craft for kids!


[…] Butterfly Pine Cone Puppets – What kind of story will your little ones tell with their fall butterfly puppets? […]